“Shiny Eyes” PSE all 4P1L prototype amplifier final testing
I am happy to announce that my second amp in the series “Shiny Eyes” is ready and sounds amazing. It is an all DHP triode strapped amplifier, using 4P1L tubes for final stage as well as for the driver stage. Beyond the measurements performed and what are they showing, real test is in the harmonic subtleties, soundstage, separation…Goosebumps in other words. As one can expect this amp will work great only with full range drivers (I am using MarkAudio Alpair 12P as described in one of the previous posts). And also certain type of music will sound better than other.
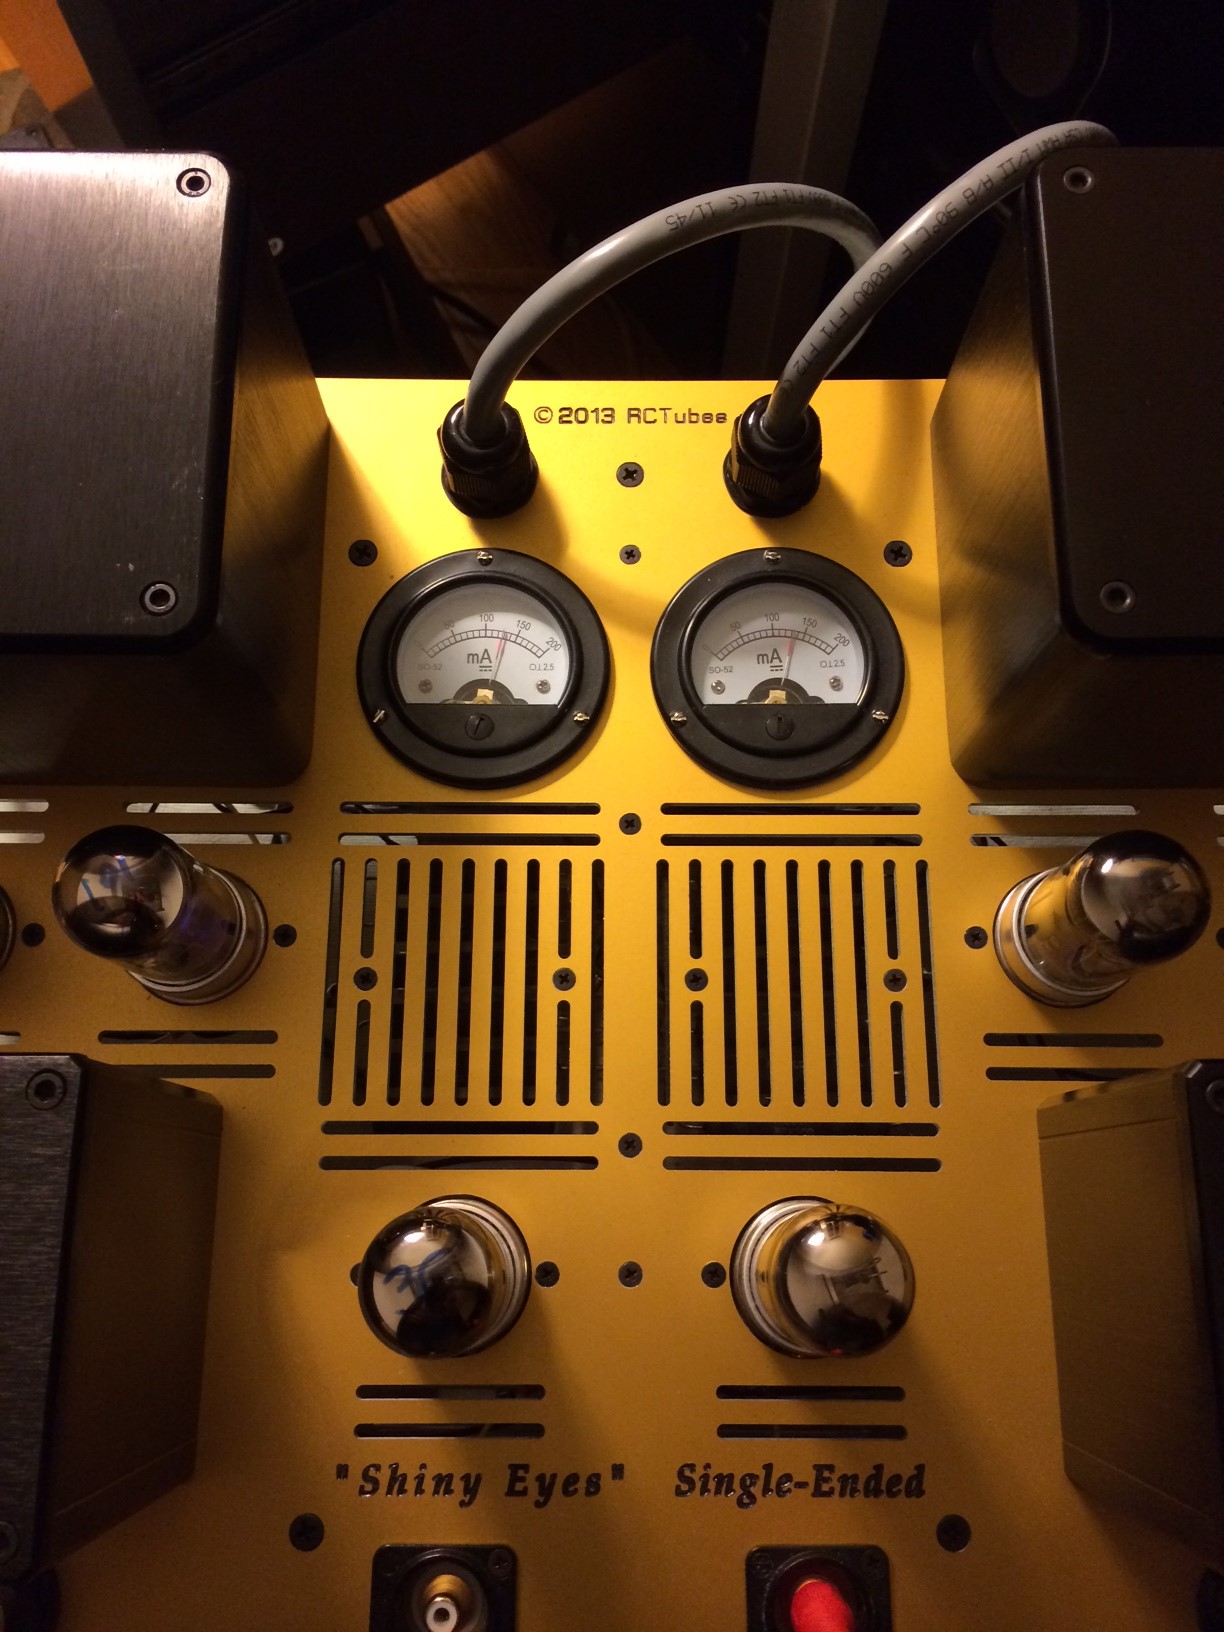
After so much tuning and retuning I settled to the following operating point:
- Final stage 254V, 36mA,-21V @ nominal filament current (2.1V, 1300mA for PSE)
- Driver stage 156V, 36mA,-8.5V @ starved filament current (2.1V, 560mA)
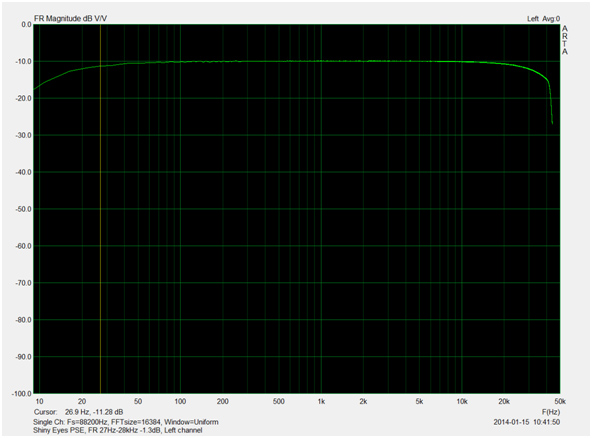
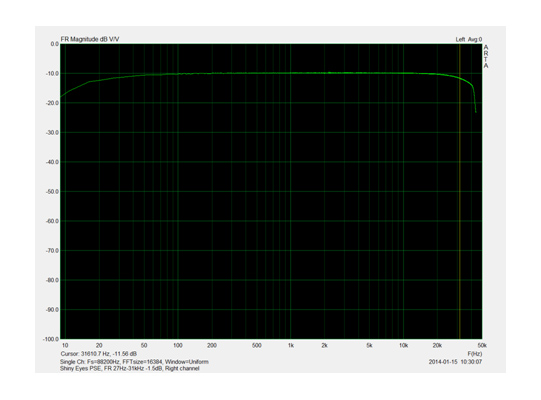
*As one will use a different set of tubes tuning might be needed and slight differences can be observed as you can see below the differences between left and right channel
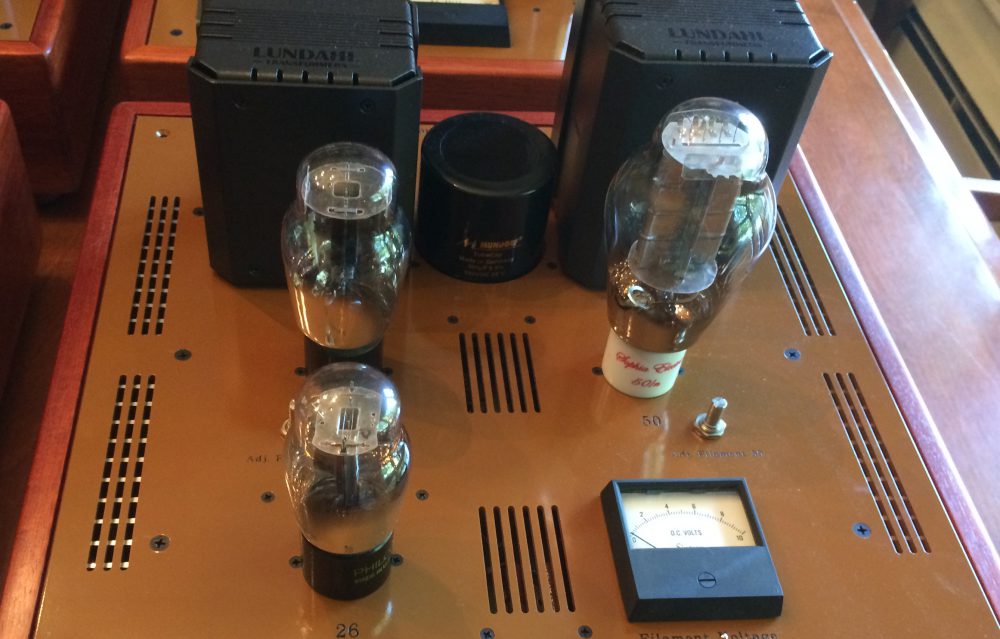
Here are some pictures while performing some listening tests:


Here is the schematic:

Shiny Eyes PSE Measurements on Final product January 2014
All tests were performed under following conditions:
- repeated several time for best accuracy and proof.
- amplifier was under stable conditions (more than 1 h of running before tests)
- ARTA software ran at identical setup
- Rigol DS1102E digital osciloscope to visualize output wave and voltage RMS under the same setup
Overall voltage gain is 4.7 times, or 13.5 dB ( Pout of 2.75W when input at 1Vrms.)
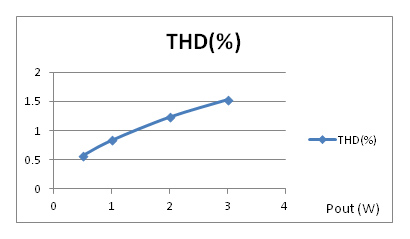
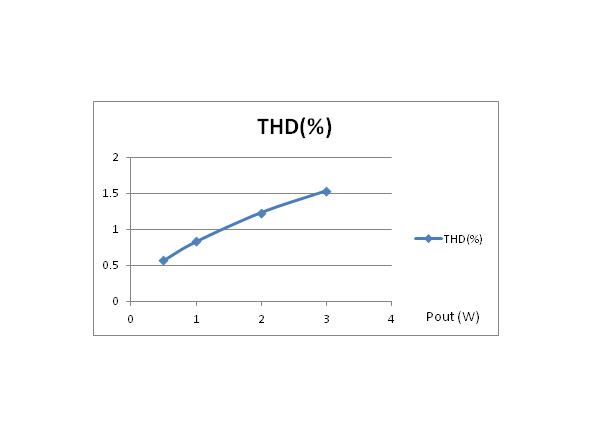
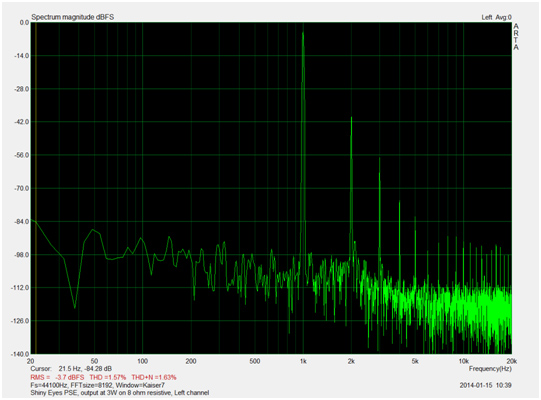
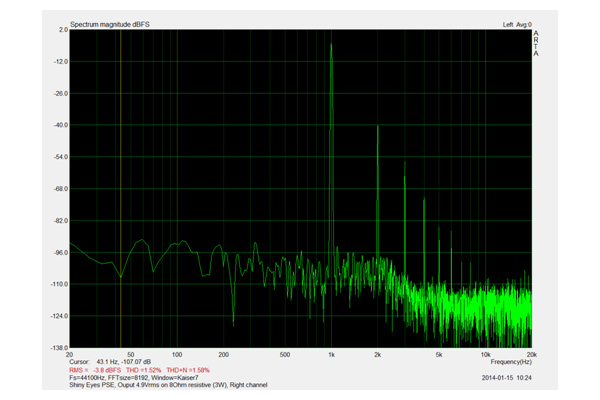
Final stage tubes are running at 9.14W, just a bit over the 9W max power. I ran some tests at 10.4W (260V/40mA) for couple hours and the THD was lower @ 1.25% at 3W (about 18% lower) and the sound seemed to be slightly better. I finally made up my mind and stayed at 36mA ( just for the reason that the OT is gapped at 70mA).
Other mechanical and heat management issues:
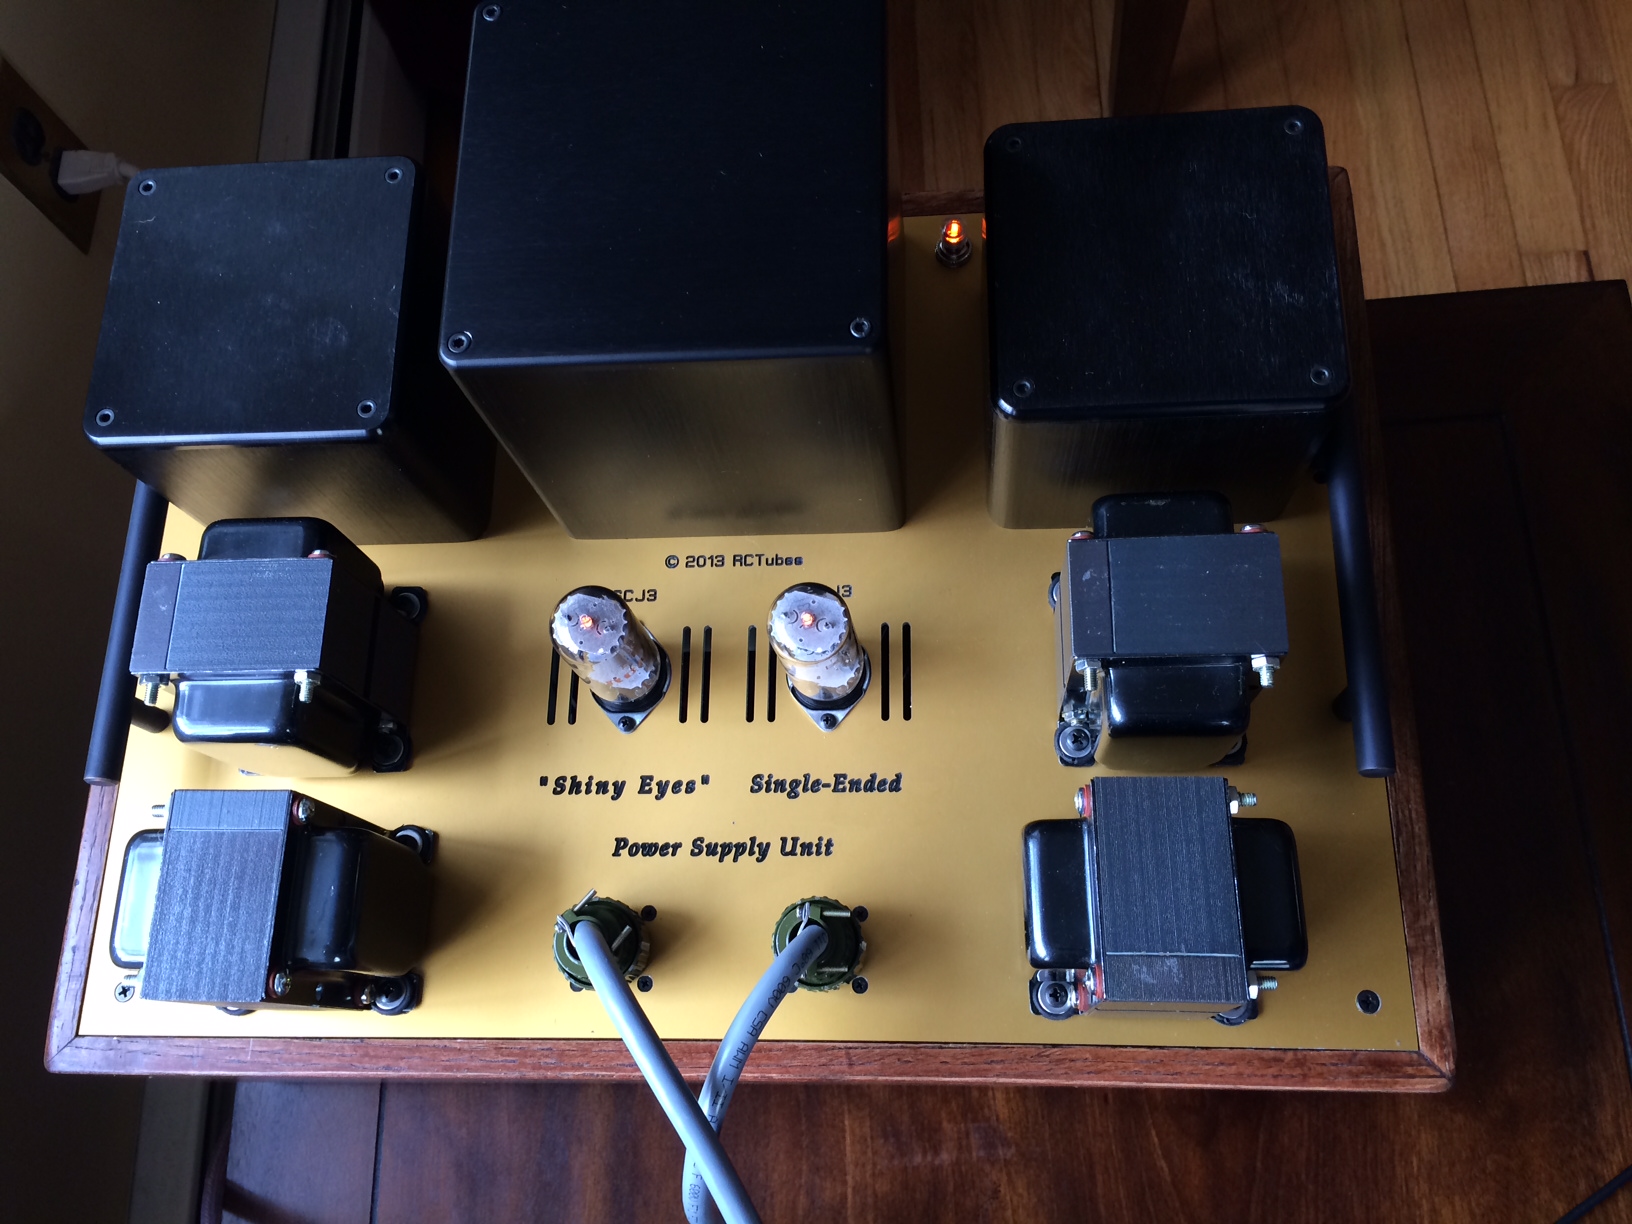
- Power supply unit is as expected very heavy weighting over 50 lbs. compared to the amp unit that weights 32 lbs.
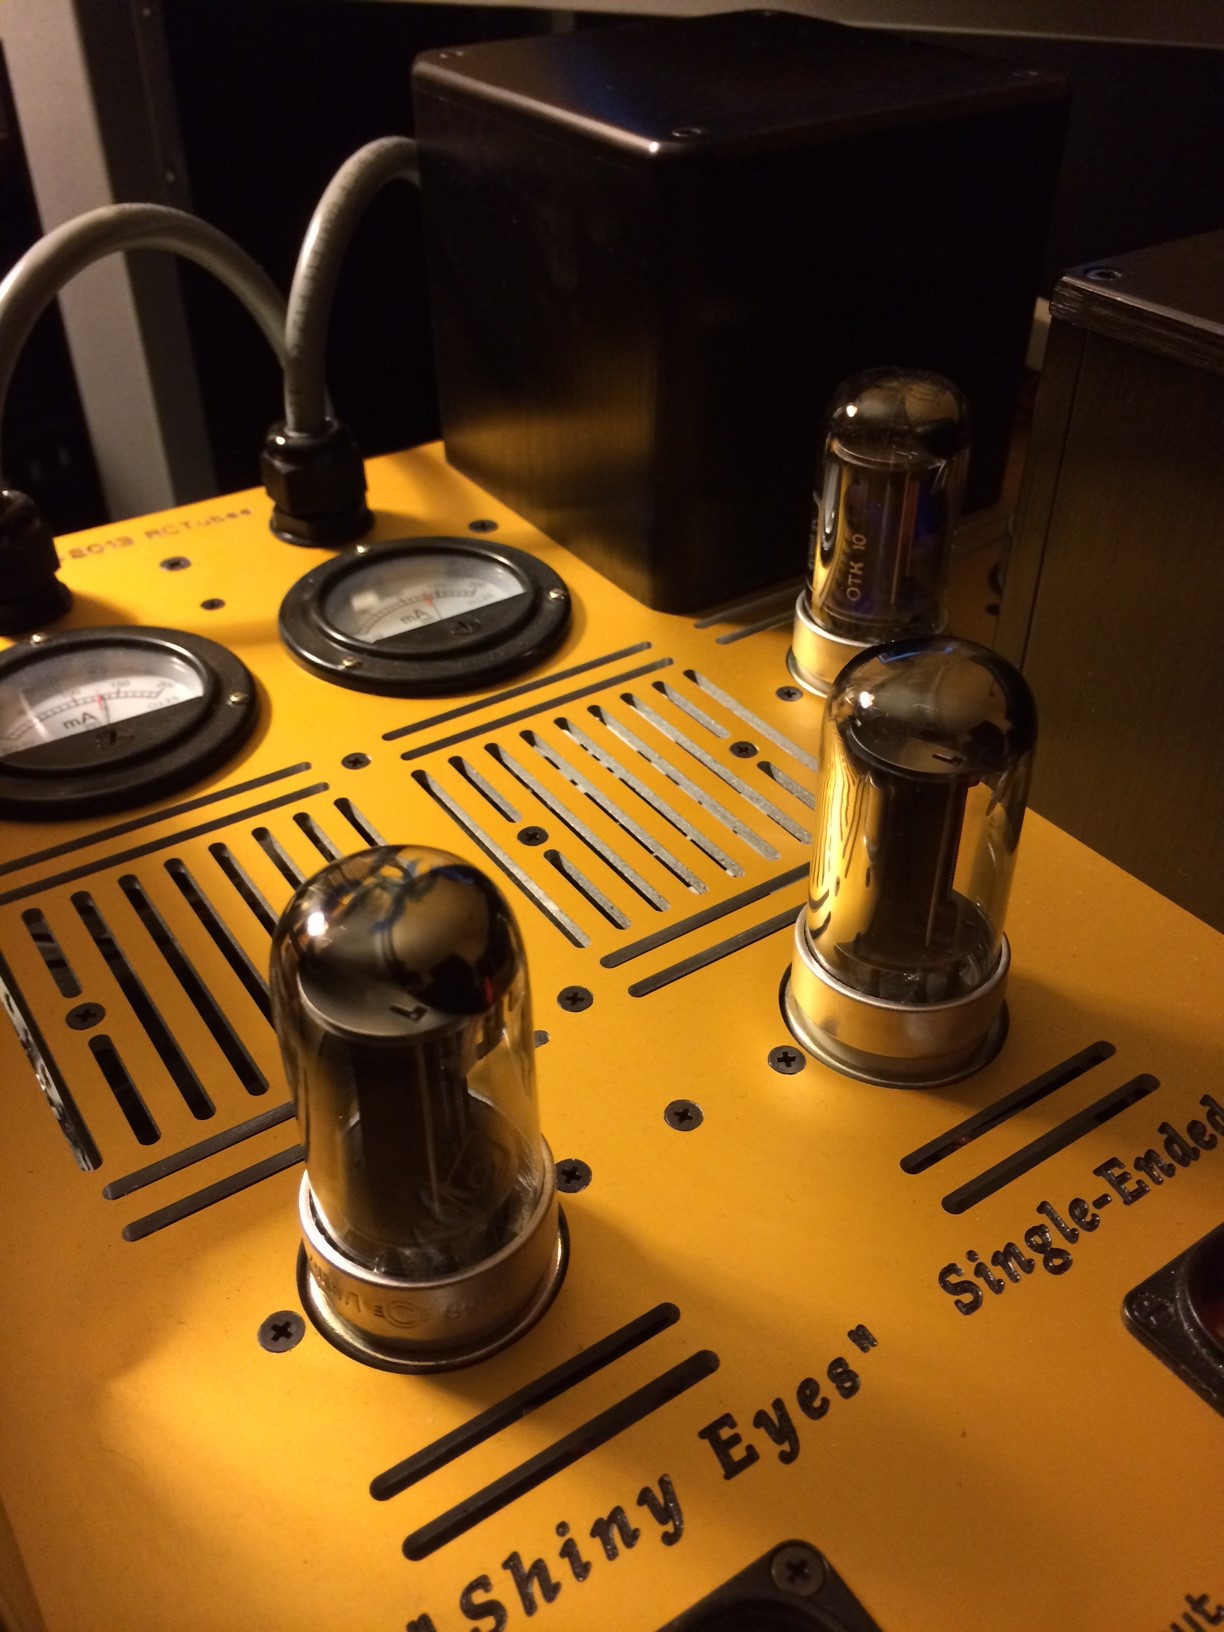
- to reduce microphony of the driver tubes, in addition to starved filament, I’ve used rubber grommets to suspend the sockets and recently I added rubber rings
- all transformers are installed on the top plate using vibration isolators(rubber grommets)
- I used metric screws as I am more used with the system
- the PSU is running slightly warm (designed with sufficient power reserve) except for the rectifier tubes (slots are provided on the top plate and a matrix of 8mm holes on the bottom of the enclosure to create free air convection for cooling
- The main amp unit presents more challenging cooling needs. I placed all the resistors for filament bias in the center of enclosure and provided large area with large enough slots. The bottom of the oak enclosure has a matrix of over 300, 8mm holes to create enough free air convection in order to push the hot air (surrounding the hot running resistors) away.
- All Rod Coleman’s filament regulators ( 4 of them, one for each stage and channel) were placed on a huge heatsink of 150mmx300mm (from heatsinkusa.com). This heatsink is mounted on 95mm stand-offs. This way the filament bias resistors are placed half way between the top plate and this big heatsink. I played the amp for 5 hours continuously and all the heat dissipated was not creating any major drifting problems. I was so relieved.
My new amp is setup for the first listening session…
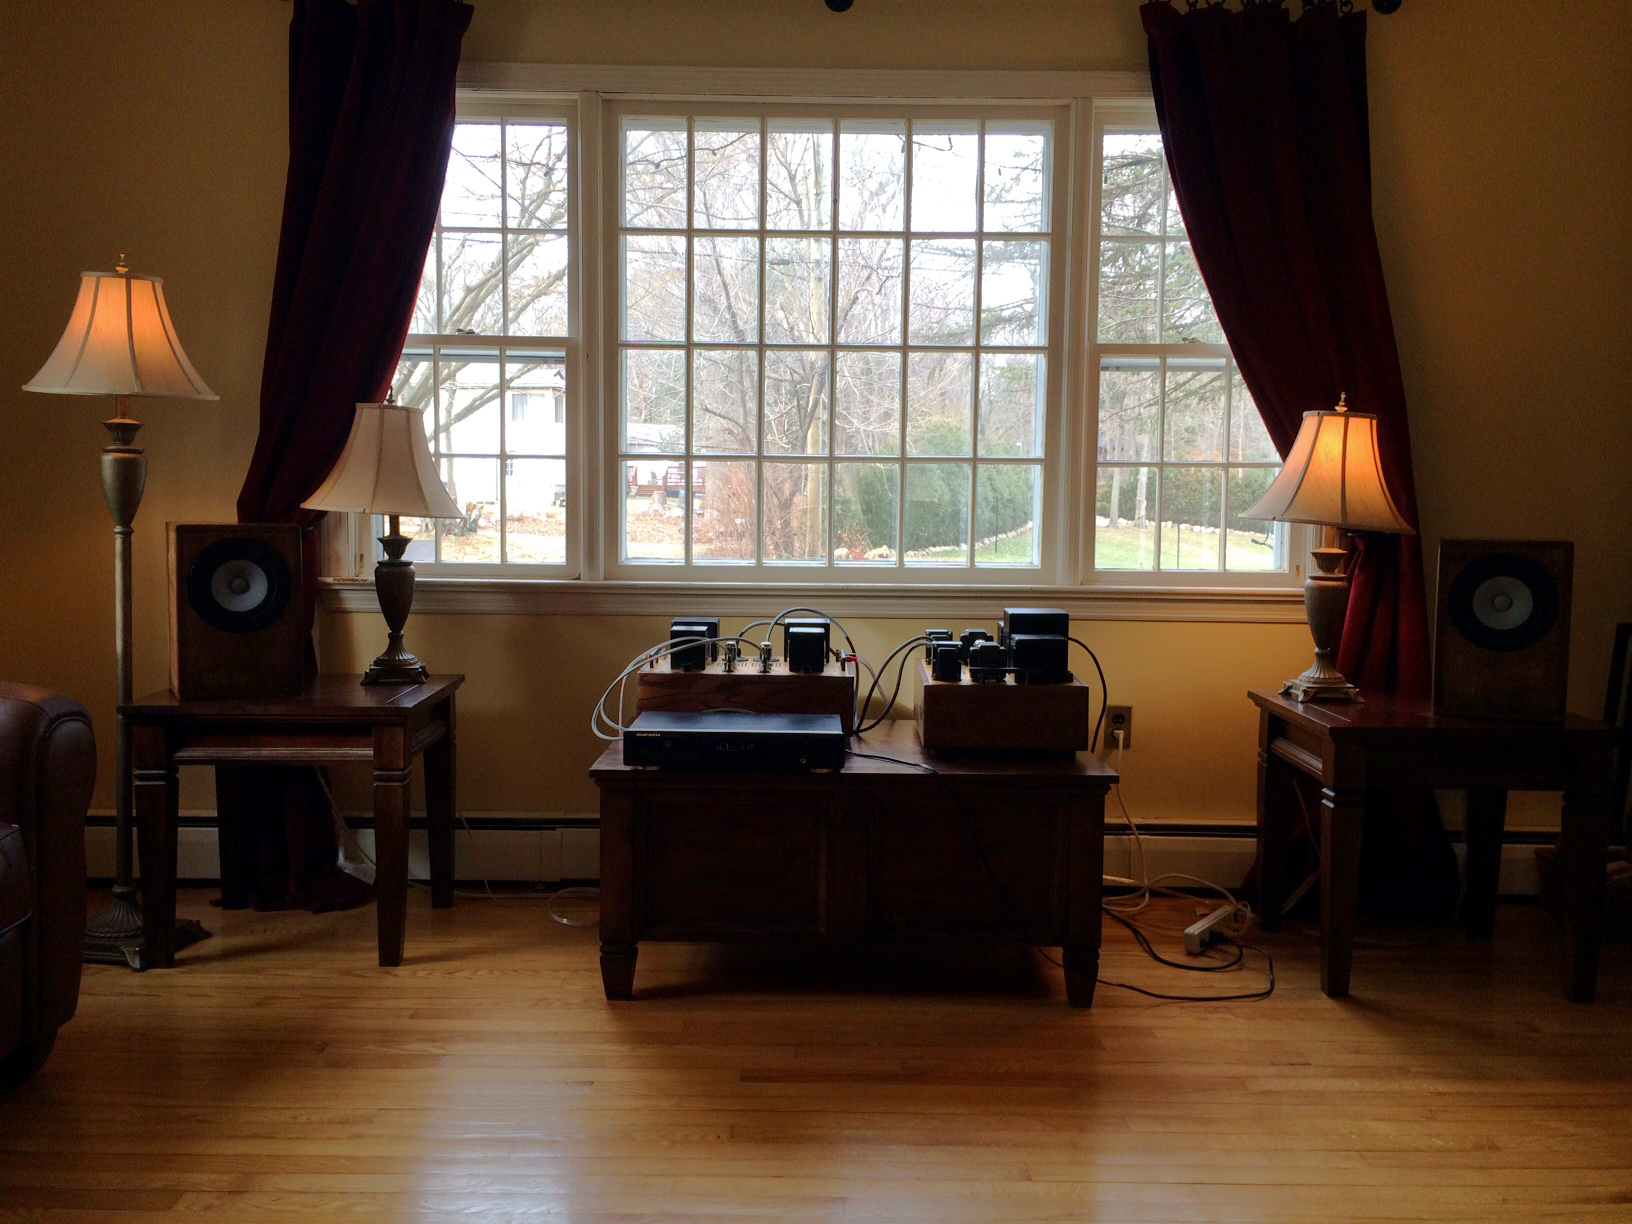
It is such a great feeling to relax, listen to your favorite music and modestly admire your own creation…an audio-visual delight well received after so many months of work.
Now I can start thinking to the last amp in the “Shiny Eyes” series…a headphone amp…different challenges, same final stage tube 4P1L…
Best,
Radu


Hi Miguel,
I tried to email but it is rejected by your postmaster.
That is correct. You can use SSHV Salas regulator as long you can go up to 55mA. The driver takes 35ma and the shunt regulator needs 20mA . That leads to a total of 55mA that you hva to adjust the CCS.
You can also buy the regulator from Kevin Carter at kandkaudio.com
Hope this helps.
I am building now an improved version of this PSE. I will post at the end of April. If you want to know what I changed let me know. No worries, there is nothing wrong with this version.
Best,
Radu
Hi Radu
I see than you are working on a new version of this Amp, at this time Im collecting the parts for build mine amp (Salas SSHV, Rod’s custom boards, Lundahl irons, Edcors Trany and Chokes)… can tell me what are the changes and improvements on this version?
Regards
Hi Miguel,
I am upgrading first cap in the power supply to a Clarity Cap TC4 ( Morgan Jones 4 wire cap) for better HF rejection. Change Edcor to LL1651. I am trying to eliminate some of the resistor series from secondary to anode rectifier tube.
I am using non-inductive resistor in place of Rsense supplied with Coleman’s regulator to see if there is a noticeable improvement.
I also upgraded the OT’s from Lundahl to Monolith Etude1. See if it is worth the investment.
I also replaced the resistors in filament circuit with Mills MRA non-inductive for even further sonic improvement.
Hope this answers your question.
Best,
Radu