Winding your own iron
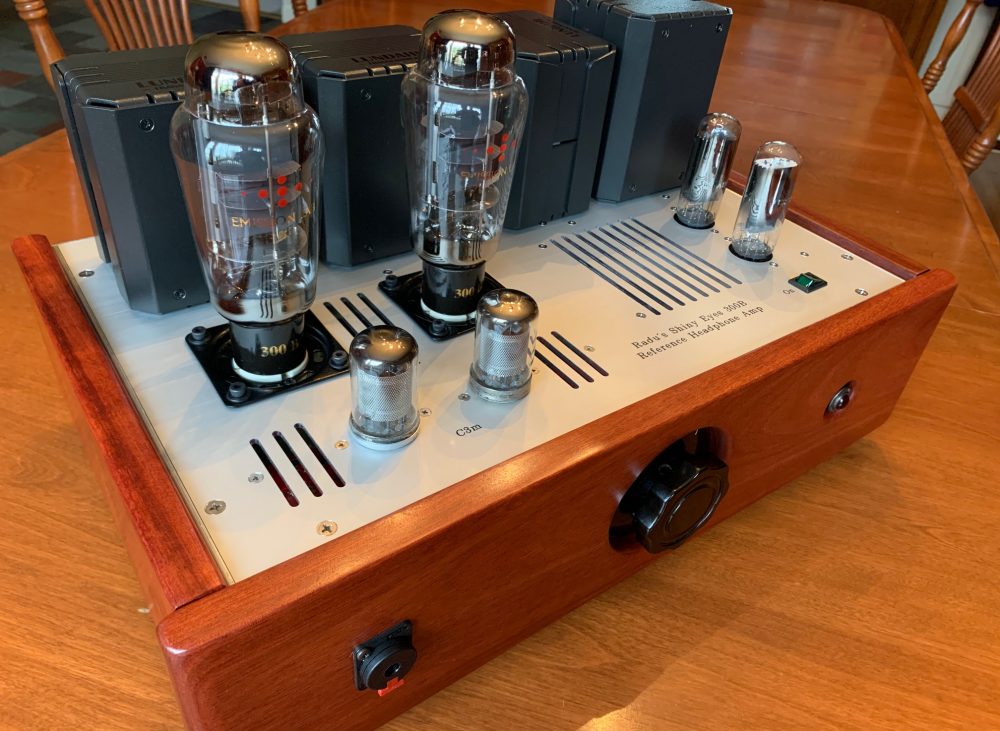
It all started with my struggle to find a transformer for single ended headphone amp (third in the “Shiny Eyes” tube amp series. For anybody who is not aware, “Shiny Eyes” tube amplifier series has a push-pull prototype built and a single-ended prototype in construction and progress made coming soon).
As a teenager, I used to wind my own power transformers and once I wound a push-pull OT for a 6V6 tube amp. As far as I remember winding a OT was not an easy job. At that time I was able to only design power transformers. Few months ago, determined by the fact that iron is quite expensive, mostly custom made, I decided to teach myself the art of winding transformers for tube amps. There is not a lot of available documentation out there, but I managed to procure enough to help me start this quest.
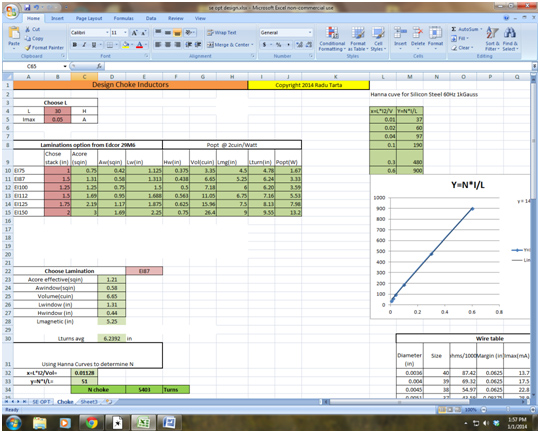
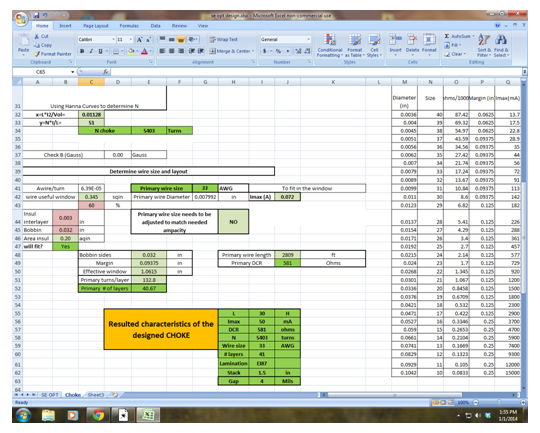
Learning to design and build iron core transformers is a long road to cover and I am at the beginning of it. I built a Excel spreadsheet to rapidly design power supply chokes. Using existing laminations data ( sizes from Edcor USA who has strands of 6″ of different size laminations) and Hanna curves for silicon steel the program calculates all data necessary to build the chokes of a desired L inductace and Idc current.
In the example below the results for a 30H/50mA choke on a EI87 lamination stacked at 1.5″ are as follows:
- Number of turns: 5403
- Wire size : 33AWG
- Number of layers : 41
- DCR of : 581 ohms
- Gapped at : 4 Mils
I will build the choke and measure it. The final gap size will be determined by experimentation using a test circuit. The test circuit is based on a ful wave tube rectifier input choke. An variable load resistor is adjusted to the DC current where the choke suppose to work at. Gap will be fitted at the lowest output ripple voltage.
Building the bobbin for my first choke:
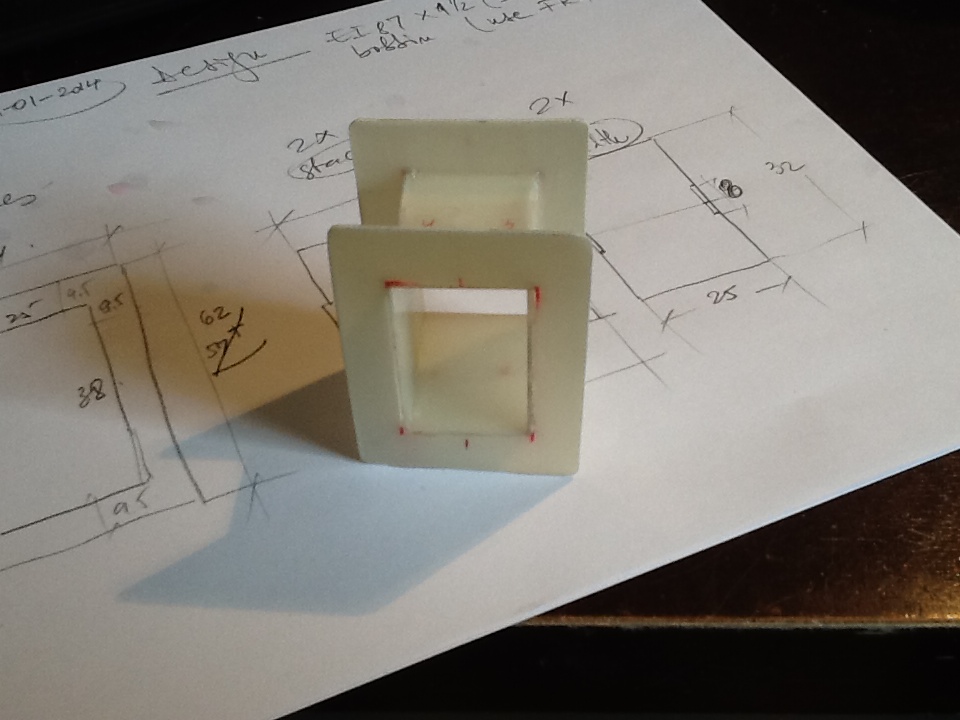
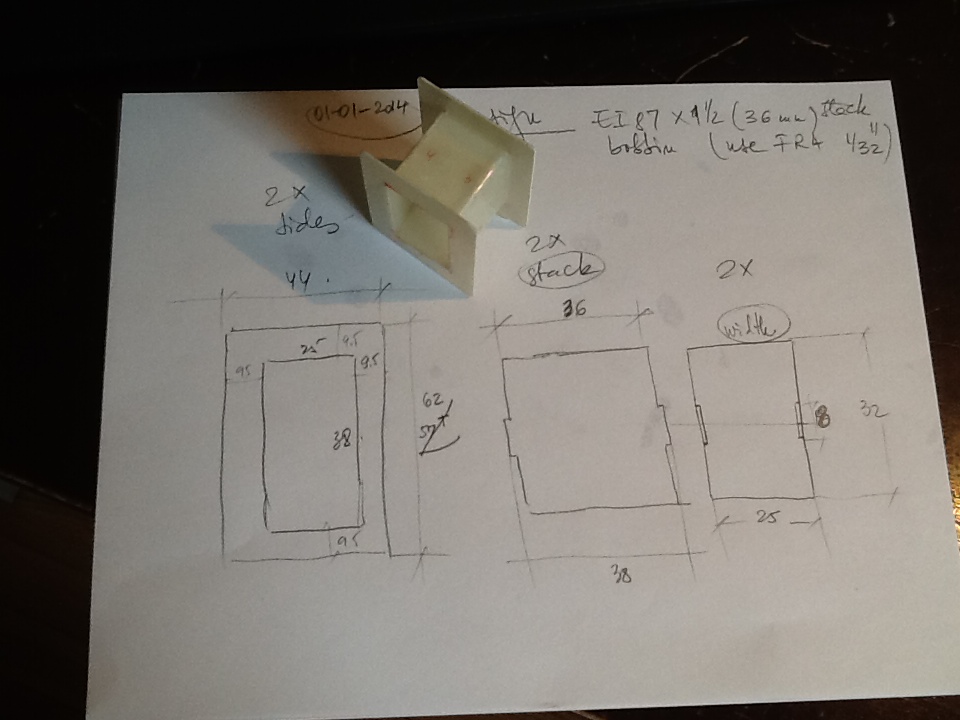
I used FR-4 G10 1/32″ from McMaster Carr. Easy to cut with Fiskars snips from Home Depot.
Choke will have end bells. Laminations, End Bells, magnet wire were procured from Edcor. Still looking for the assembling screws, nuts and plastic washers. I am also not sure how am I going to seal it.
I will come back to show the progress…

Seems a nice project, very useful experience to any tube amp.
I look forward to the project progress.